
1. Log into your hoster's admin panel
Choose your web hosting settings. Somewhere amongst these settings, you should find "Data base". Find out where you can access "phpMyAdmin". This allows you to manually write into the databases of your WordPress installation.
2. Insert a new user in wp_users
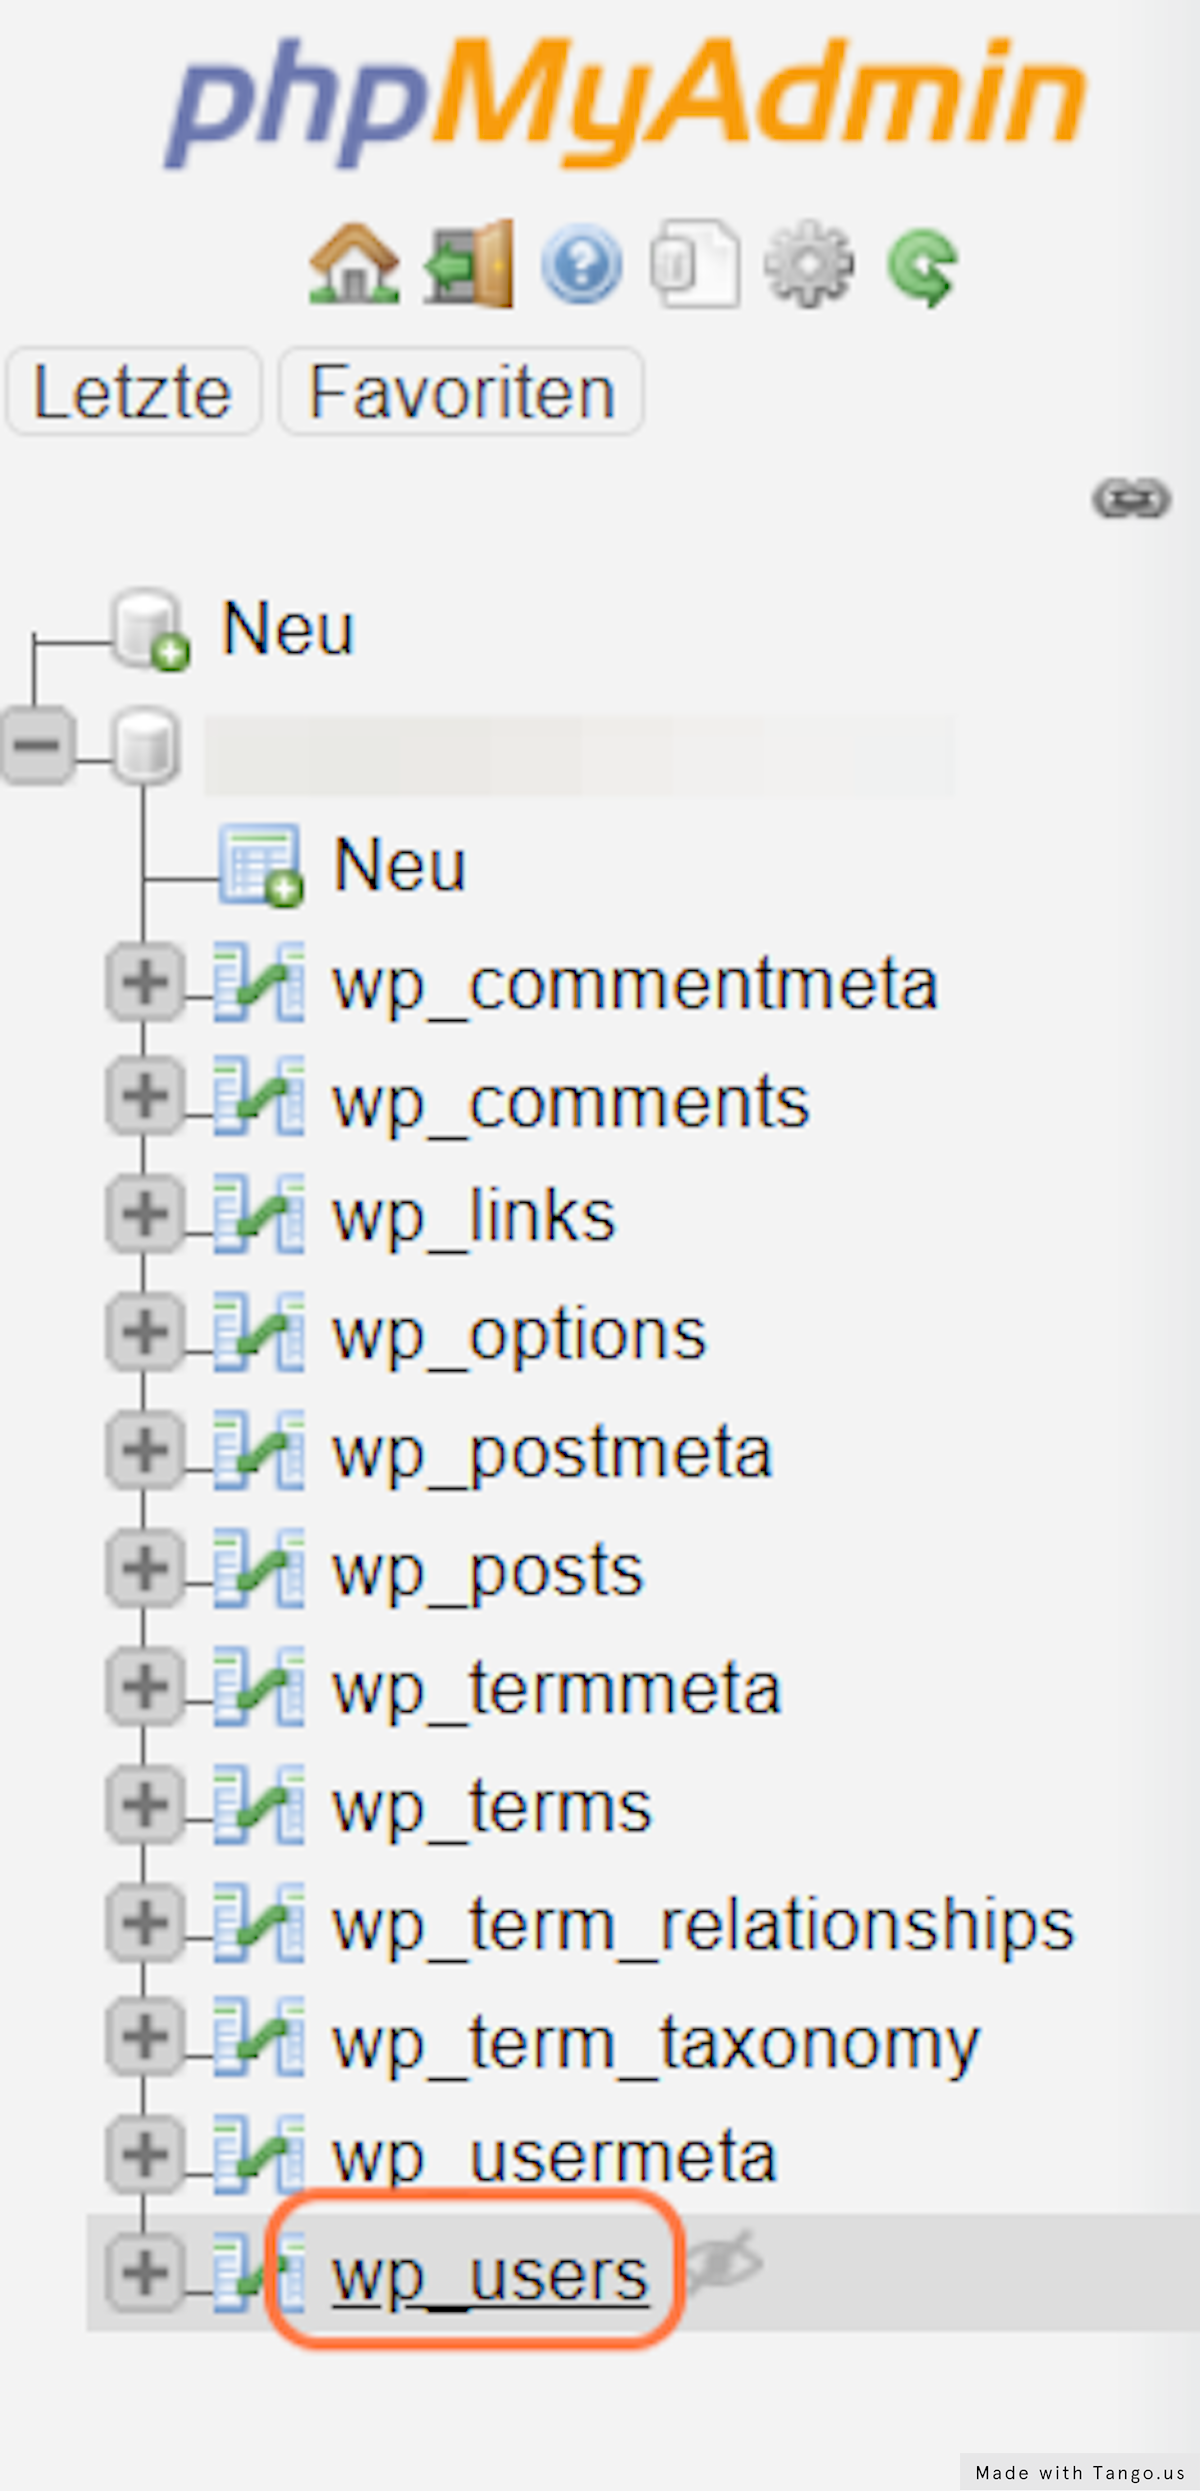
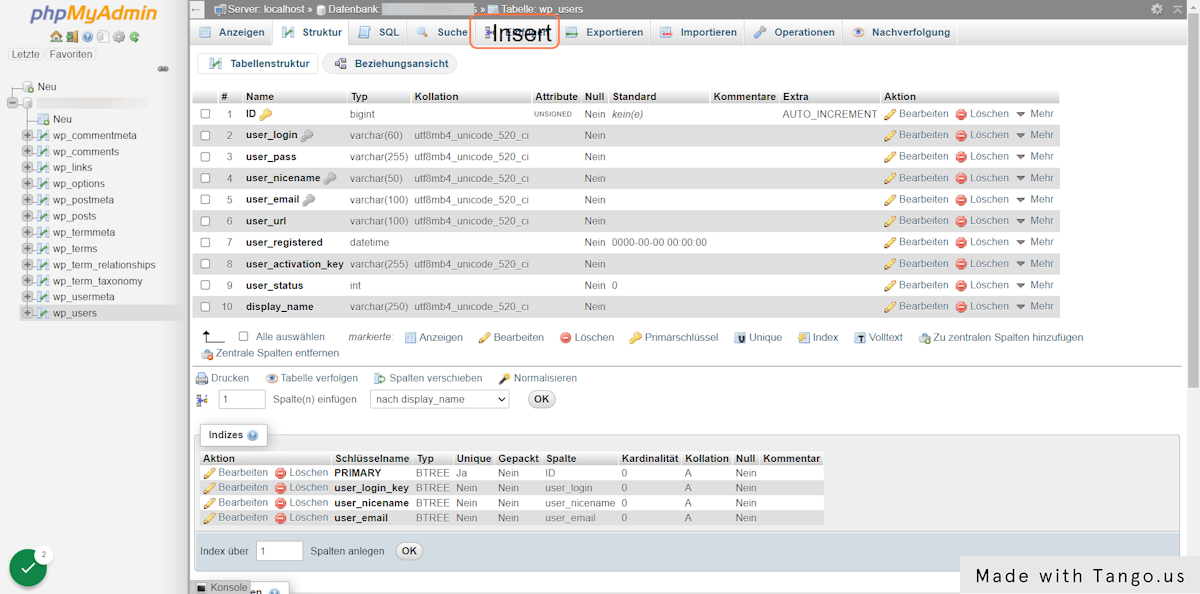
Here you see the different databases that have been added by your WordPress installation. Depending on whether you renamed your database prefix at installation, your databases prefix might differ from the example below. To add a new user, we need the wp_users database. Click on wp_users in the menu on the left.
3. Insert a new user entry
In the top tab, click on "Insert" to create a new user entry.
4. Add your user information
Now, you need to add the right values in the right columns. Here's how you fill in the mandatory fields:
ID: insert a number. It should be the next highest number in terms of your number of users your website already has. So, if you have already 2 users registered, the value you insert here should be 3. If you lost all users to your site, this should be your first user entry, so you insert "1". Keep in mind which ID you chose, you will need it again later in the process.
user_login: insert your username in one word. This field cannot contain special characters. Save your username in your personal password manager.
user_pass: insert a strong password here, ideally containing letters, numbers and special characters. Make sure to choose "MD5" in the function column in order to protect your password by hashing it. Save your password - you will need it later to log on to your site.
user_nicename: enter your nickname here, it can consist of one or more words and is required by WordPress.
user_email: insert the e-mail address you want to use your WordPress account with here.
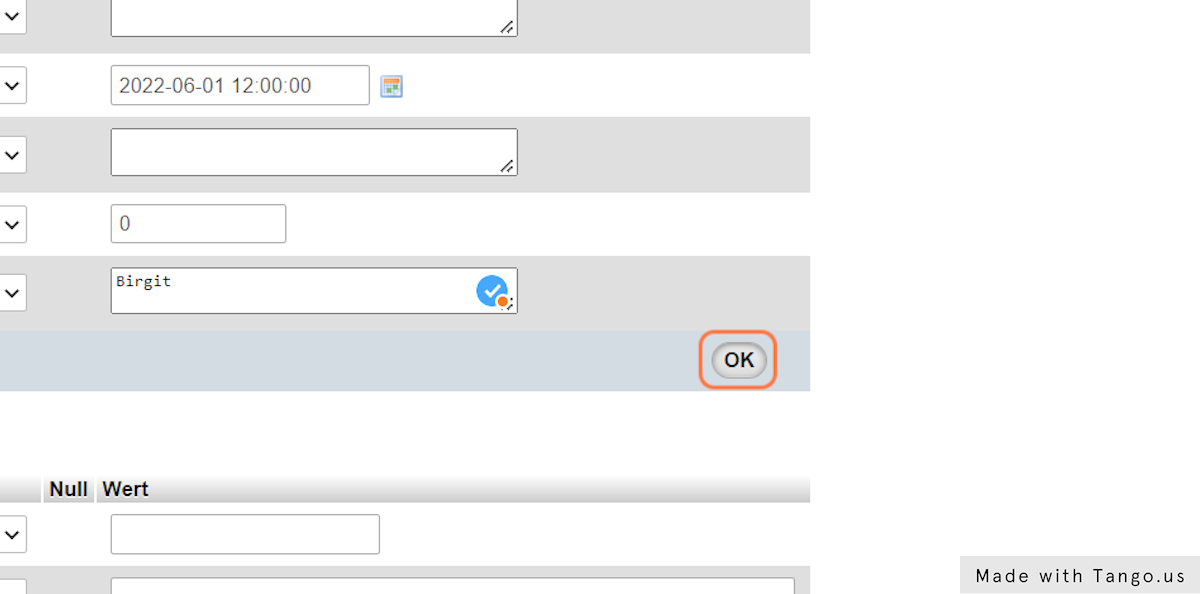
user_registered: here, you need to select a date and time of registration. Click on the little calendar icon to select the current date and time.
display_name: insert here, how you want your user's name to be displayed throughout the page. If you were to register your new user in the WordPress backend, you'd be able to choose here from your username, your nickname, your first and / or last name. Choose something that works for you here.

Click on OK to save your entry:
5. Set admin rights
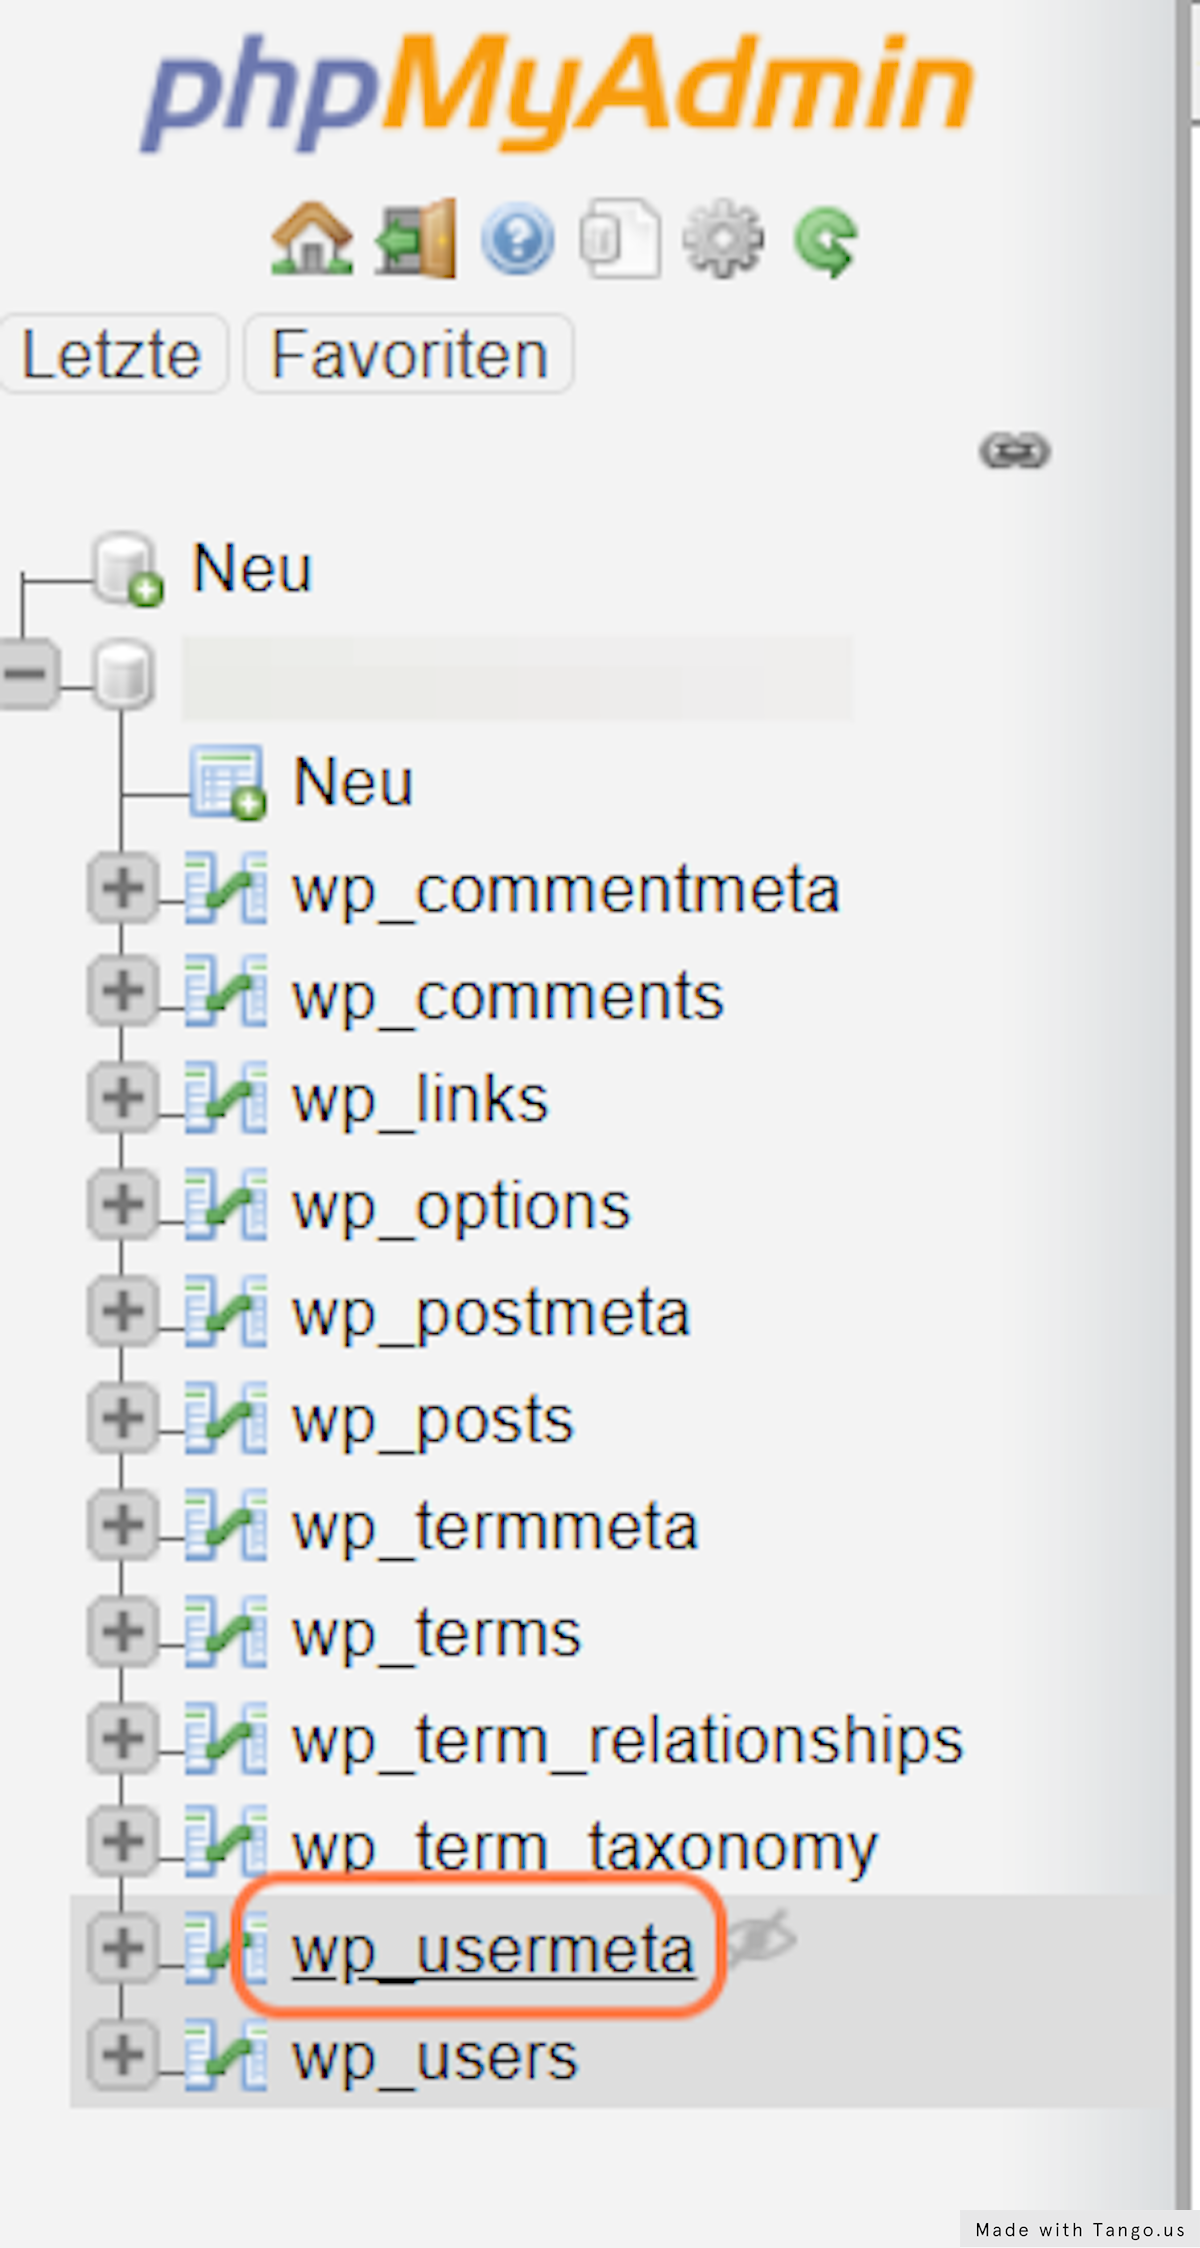
In your database menu, click on "wp_usermeta" in order to give your new user administration rights.
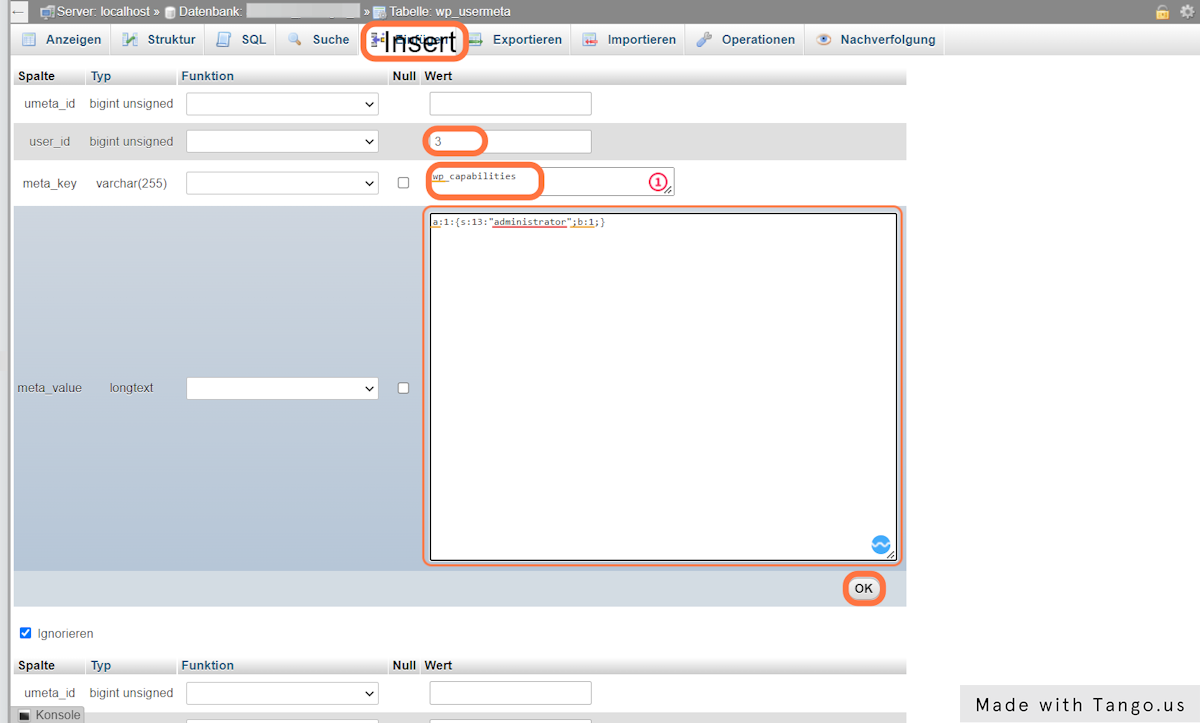
6. Insert capabilities entry
Click on "Insert" again to add a new database entry and fill the form in as follows.
unmeta_id: leave empty, this will be automatically filled in.
user_id: add your chosen ID of the user you just set up. In this example, it is "3" - if you're registering your first user, it might be "1".
meta_key: insert "wp_capabilities".
meta_value: insert "a:1:{s:13:"administrator";b:1;}". Make sure to write the brackets yourself, as they copy-pasted ones might be resulting in errors.
Click "OK" underneath the meta_value row to save your entry.
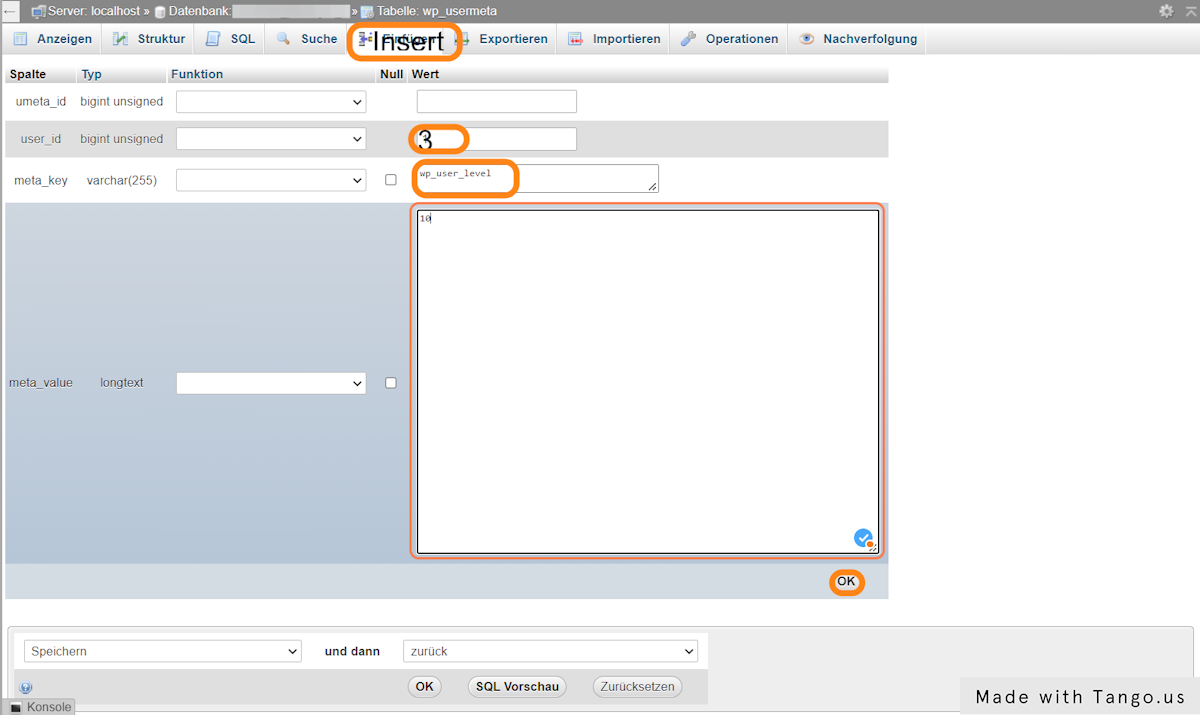
7. Insert user level entry
In the same database "wp_usermeta", you now add another entry. Therefore, click again on "Insert" und fill in the following:
unmeta_id: leave empty again.
user_id: insert the same user ID you've been using throughout this process.
meta_key: insert "wp_user_level".
meta_value: insert "10".
Click on "OK" and you're done.
8. Log in to your website
Now, you should be able to log in to your website again with the username and password you saved in your password manager. Go to "yourdomain.com/wp-admin" and insert your log in data to access your website. On the tab "users", you can also add more details to the user you just inserted in the database or regularly create new users.